Fordefi facilitates exchange deposits and withdrawals with built-in policy enforcement and transaction validation.
Withdrawals, in this context, are transfers from an exchange to a Fordefi vault, another exchange, or an external address.
Most exchanges support enforcing a whitelist on all withdrawal addresses. If the configuration of your exchange account requires address whitelisting, you must add any withdrawal addresses to the whitelist. This configuration must be done directly in the exchange, by logging in to your exchange account.
In the Fordefi web console, click Connected Accounts, then click the Exchanges tab. From the list that is displayed, click the exchange vault you wish to withdraw from.
Click Transfer in the upper-right corner of the screen.
Provide details for the fields in the dialog that appears.
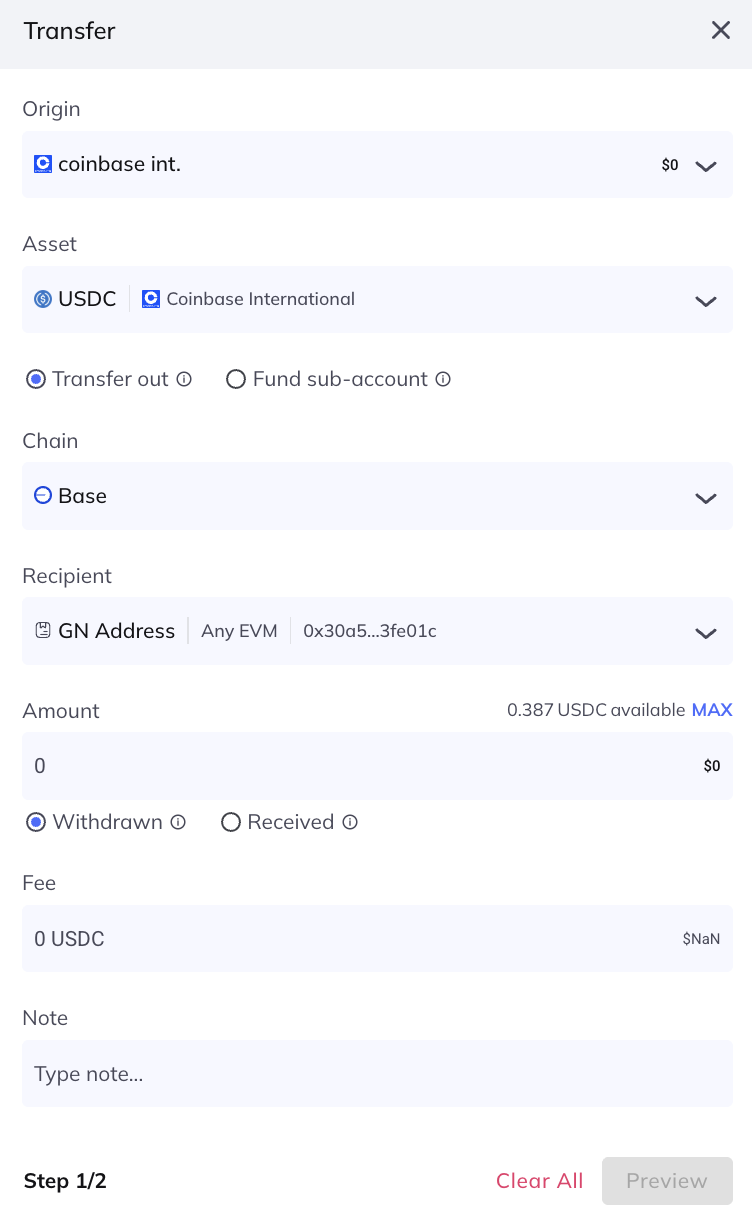
- Origin: Select the paying vault.
- Asset: Select the asset. Also, select an option:
- Fund sub-account: In exchanges, an account can have multiple sub-accounts. It's a hierarchy with only one level of nesting - only the master account and its subaccounts. This option indicates a transfer within this family of a master account, and its sub accounts:
- master -> sub
- sub -> master
- sub -> sub
- Transfer out: Any other transfer
- Fund sub-account: In exchanges, an account can have multiple sub-accounts. It's a hierarchy with only one level of nesting - only the master account and its subaccounts. This option indicates a transfer within this family of a master account, and its sub accounts:
- Chain: Select the chain.
- Recipient: Select the receiving vault. There is no need to specify an address.
- Amount: Select either Withdrawn (gross, or before deduction of withdrawal fees) or Received (net, or after deduction of withdrawal fees).
Click Preview to see a summary of the transaction, to view any possible warnings, to review policy and approvers, and so on.
To proceed, click Create Transaction.
Deposits, in this context, are transfers from a Fordefi vault to an exchange.
In the Fordefi web console, click Vaults > Vaults and click the Fordefi vault you wish to transfer from.
Click Transfer in the upper-right corner of the screen.
Provide details for the fields in the dialog that appears.
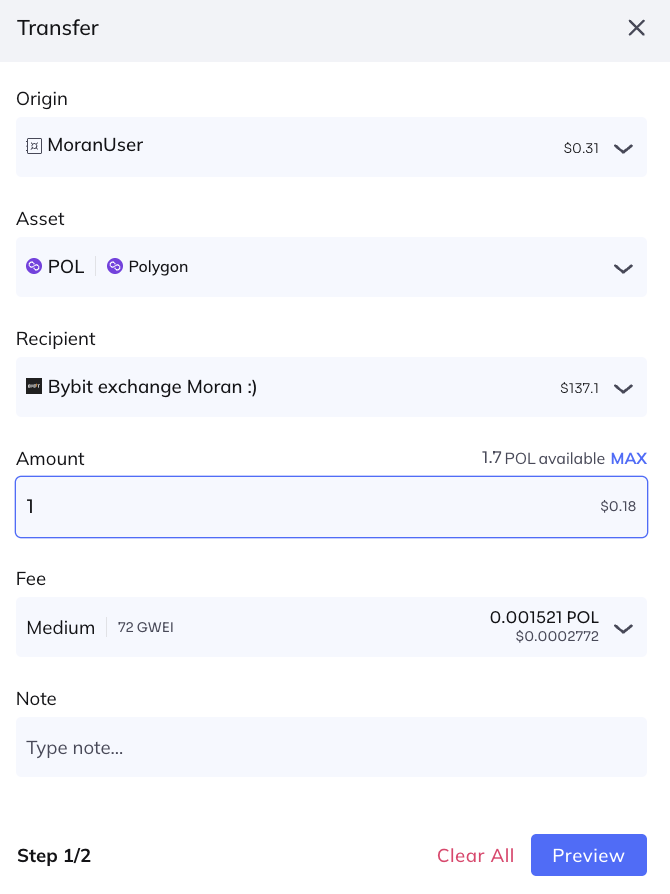
- Origin: Select the vault to transfer from. There is no need to specify an address.
- Asset: Select the token.
- Recipient: Click Exchange Vaults, then select the receiving exchange.
- Amount: Specify an amount or click MAX to specify the full quantity currently available in the vault.
- Fee: Either select Low, Medium, or High (to let Fordefi set the fee); alternatively, click Set custom fee to specify custom values.
Click Preview to see a summary of the transaction, to view any possible warnings, to review policy and approvers and so on.
To proceed, click Create Transaction.