This page describes how to add an API user.
An API user allows you to perform certain system actions (such as making a transaction) directly through the API rather than using the Fordefi Web console. In creating the API user, you generate an access token that provides the necessary permissions to authenticate and perform these programmatic operations.
Adding an API user is an action that requires approval from the Admin Quorum.
In the Fordefi web console, click User Management in the side menu, then click the API Users tab.
In the Add user button, click the arrow and select Add API user.
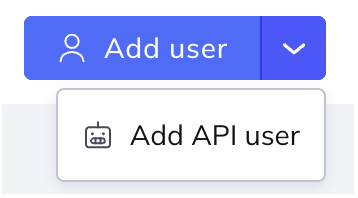
The Add API user wizard is displayed, at the Setup screen.
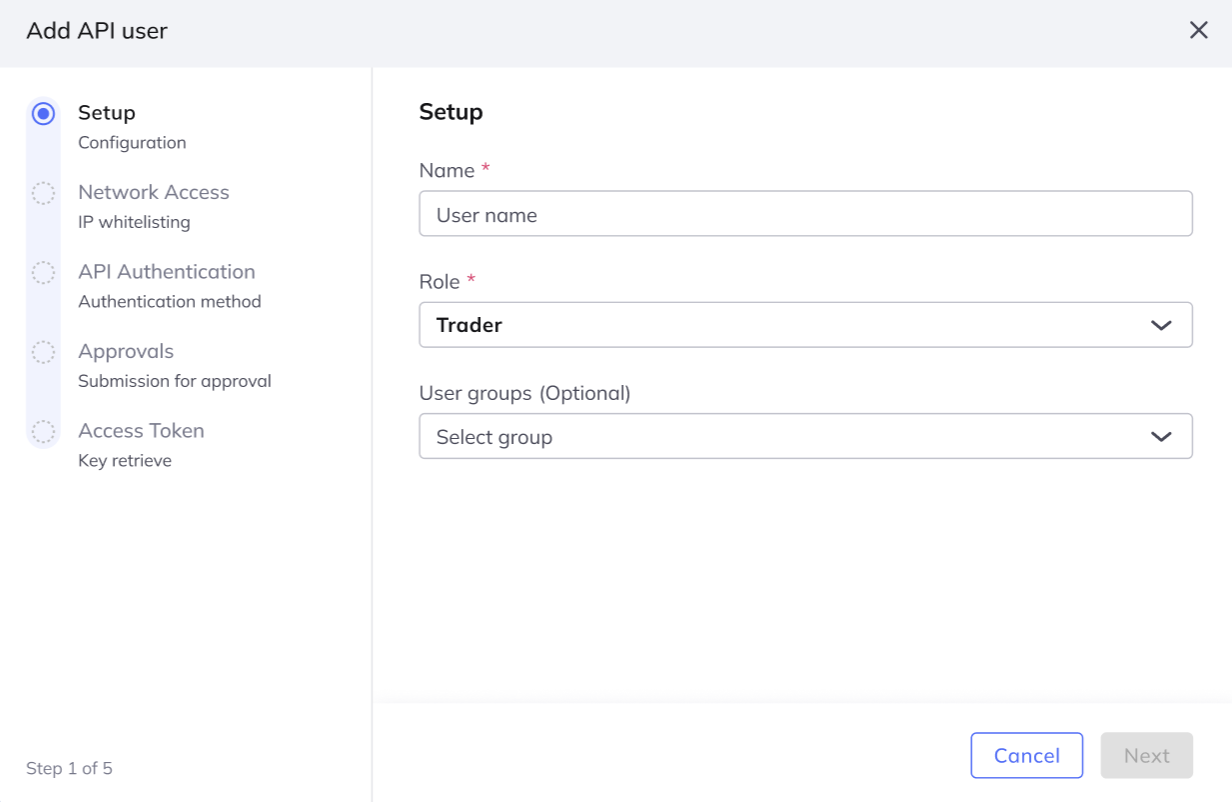
Enter a name for the API user, assign a role (Trader or Viewer), and (optionally) assign one or more user groups.
Click Next.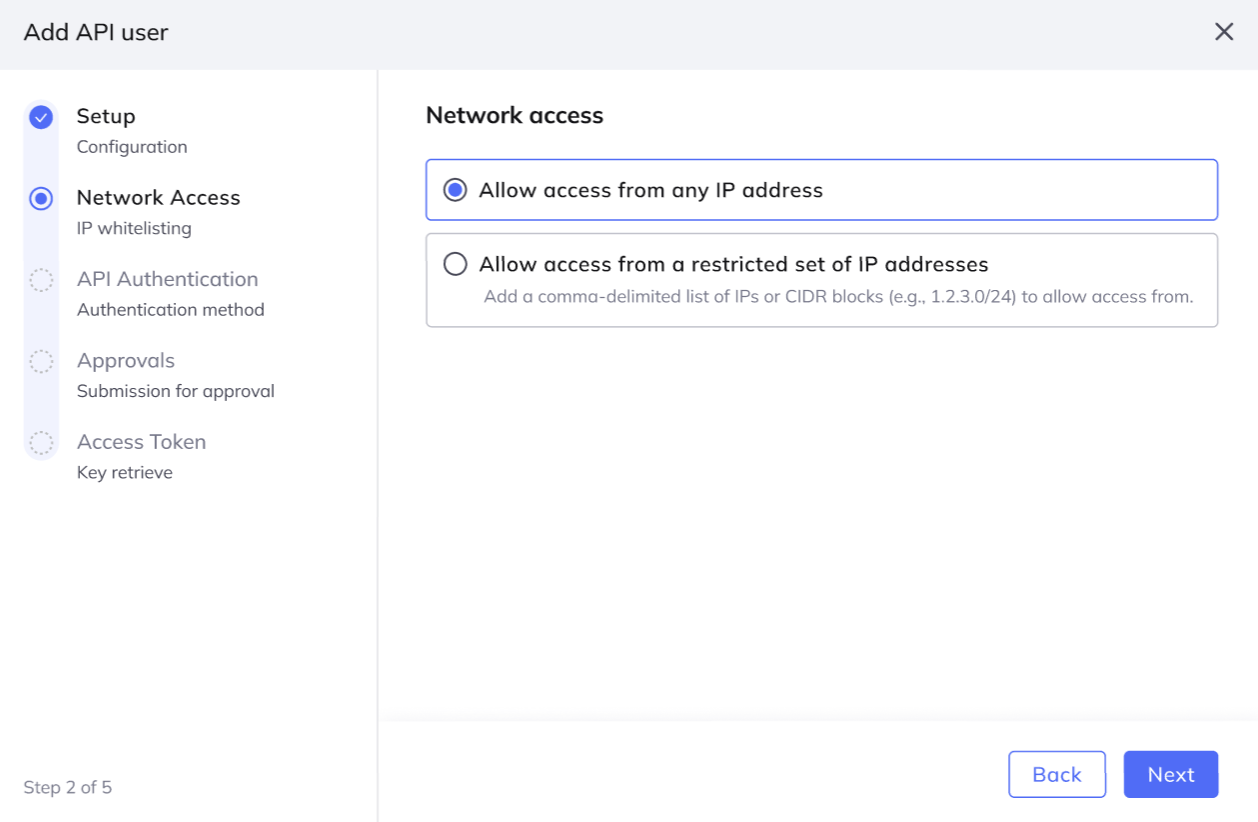
In the Network Access screen, select one of the following options:
- Allow access from any IP address (default): Allows the API user to make API calls from any IP address.
- Allow access from a restricted set of IP addresses: Allows the API user to make API calls only from the listed IP addresses. If you choose this option, in the field that opens, add a comma-separated list of IPv4 addresses, where each address can either be an individual IP (for example:
1.2.3.4) or a CIDR block (for example:1.2.3.0/24).
Click Next.
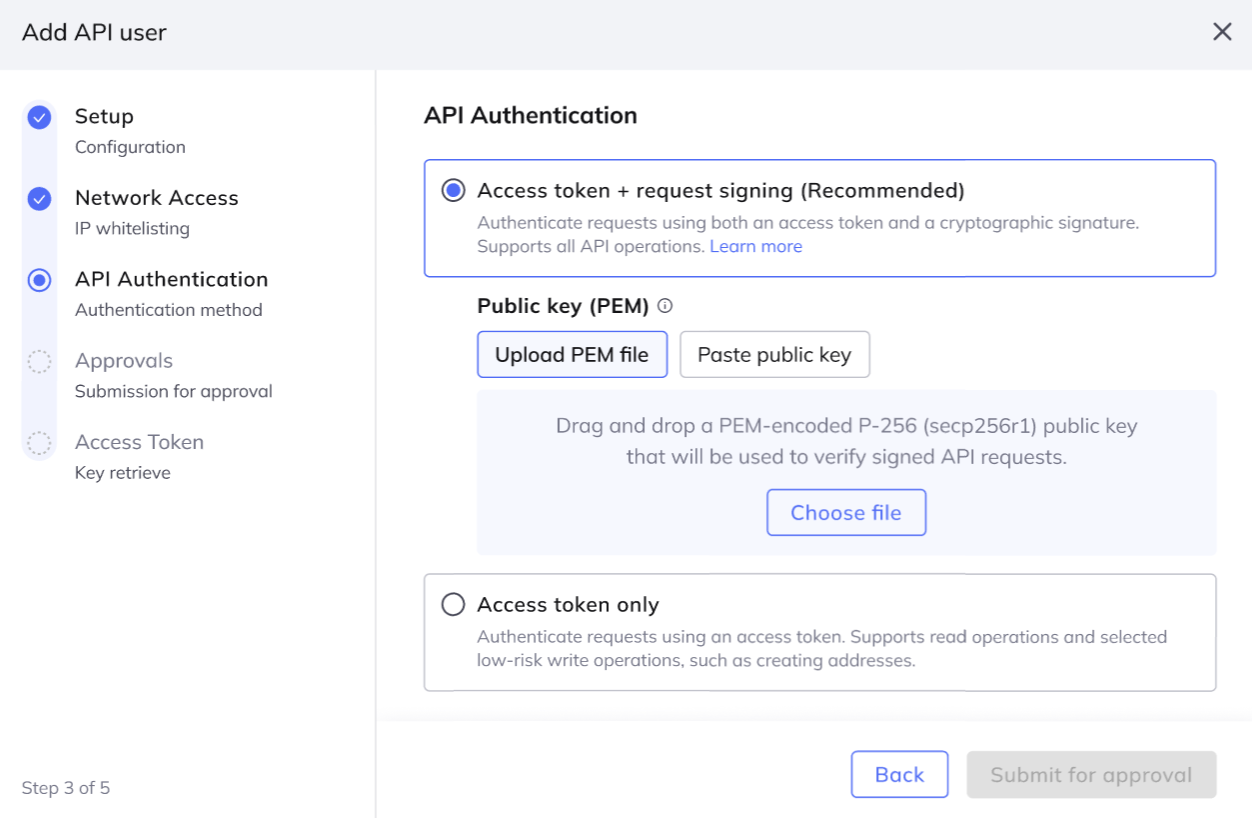
In the API Authentication screen, select one of the following options:
- Option 1 - Access token only: Fordefi creates an access token that you can use to authenticate read requests sent to the Fordefi API.
- Option 2 - Access token and request signing: Fordefi creates an access token and you must also upload or paste a public key. Fordefi uses the public key to verify signatures for sensitive operations, such as creating a transaction or creating or editing Address Book contacts.
For option 2, you can create the keypair using openSSL and upload the public.pem into Fordefi:
# Generate the private.pem key file
openssl ecparam -genkey -name prime256v1 -noout -out private.pem

# Derive the public.pem key file
openssl ec -in private.pem -pubout -out public.pem
Click Submit for approval.
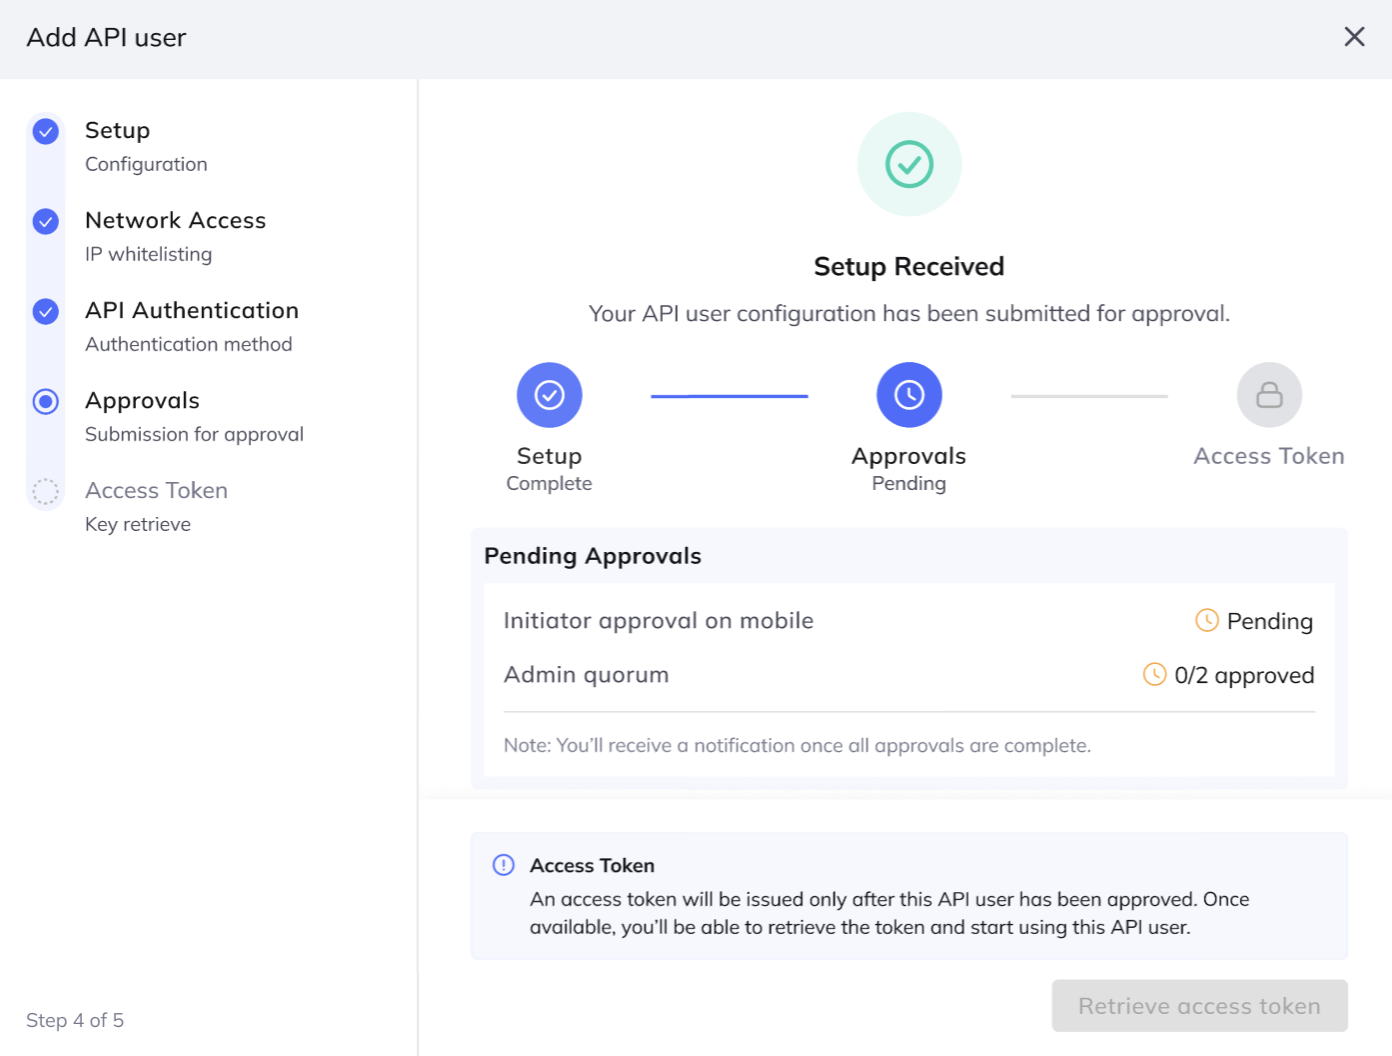
The Approvals screen is displayed. You can track the status of the approval here.
NoteThe addition of the API user is subject to the approval of the Admin Quorum. Quorum members approve in the Fordefi mobile app under Management > Pending.
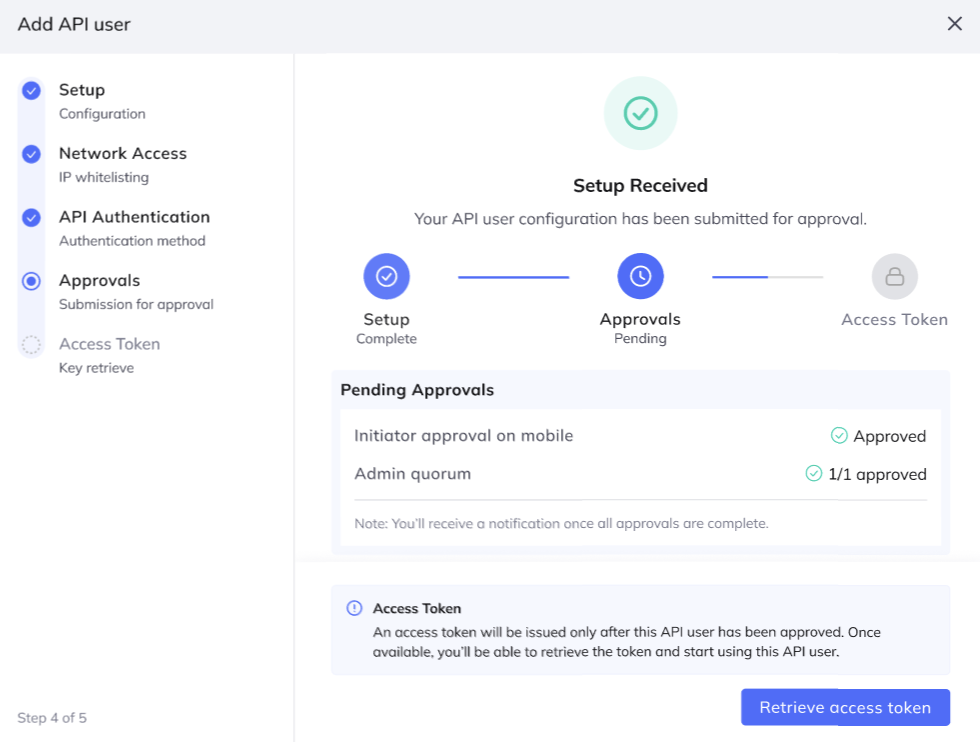
When approval is granted, click Retrieve access token.
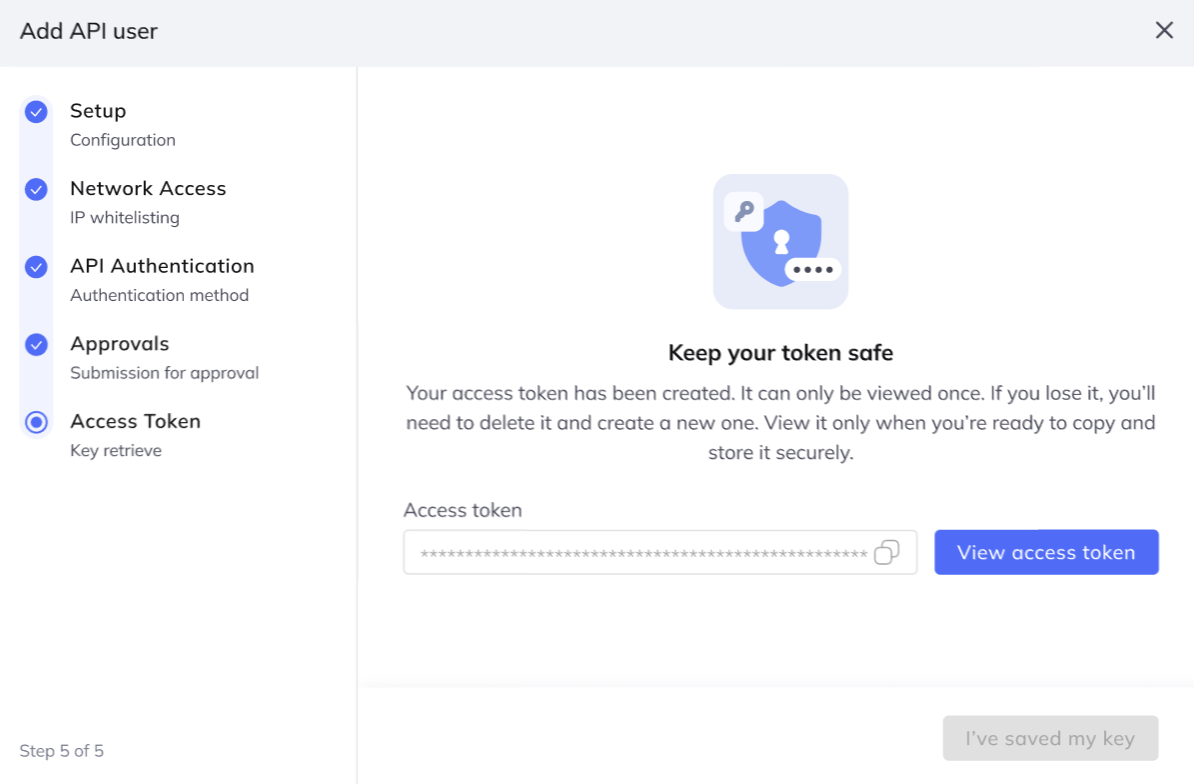
In this final Access Token screen, click View access token. Copy the token and store it in a secure location.
NoteThe access token will disappear when you click I've saved my key.
When you have copied the token, click I've saved my key.
The API user is now active and can authenticate API requests.
API user access tokens (JWT) have a 10-year expiry from the time of creation. You can check the creation date in the Created column on the User Management > API Users page. After expiry, you will need to generate a new token by creating a new API user.
You can edit the IP addresses that are permitted for an API user.
View the API users that are defined for the organization: In the Fordefi web console, click User Management > API Users.
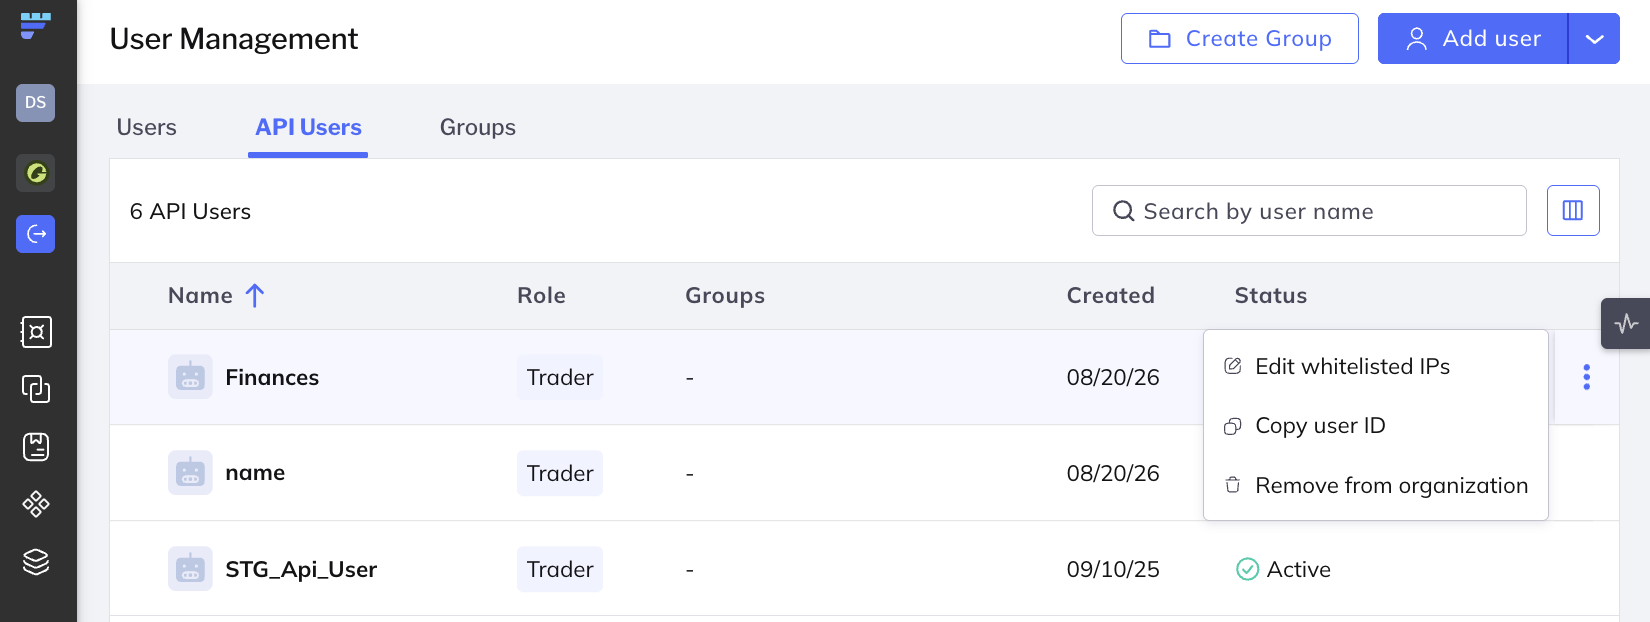
Hover over the API user whose IPs you wish to edit. Click the ellipsis menu at the extreme right and click Edit whitelisted IPs.
In the dialog that opens, click Allow access from a restricted set of IP addresses. Enter the relevant IPs in the field that opens.
Click Save.